Caring for your furry friend goes beyond regular walks and feeding; it includes maintaining their overall health, which often means paying attention to the little things—like their ears. Cleaning your dog’s ears at home can seem daunting, but with the right approach, it can become a simple and rewarding part of your routine. In this guide, we’ll walk you through the process of safely cleaning your dog’s ears, ensuring it’s a comfortable experience for both you and your pet. With a gentle touch and a few essential tips, you can help keep your dog’s ears healthy and free from irritation or infection. Let’s embark on this small yet significant journey to ensure your canine companion feels their best, one ear at a time.
Choosing the Right Tools and Products for Gentle Ear Cleaning
When it comes to maintaining your furry friend’s ear health, selecting the appropriate tools and products is crucial. Start with a vet-approved ear cleaning solution. These solutions are specifically designed to break down wax and debris while maintaining the natural pH balance of your dog’s ears. Avoid using hydrogen peroxide or vinegar, as they can irritate the sensitive ear canal.
- Cotton Balls or Pads: Use these to gently wipe away any excess solution and debris. Avoid using cotton swabs, as they can push debris further into the ear canal.
- Soft Towel: A soft towel is perfect for drying your dog’s ears after cleaning, ensuring no moisture is left behind, which can lead to infections.
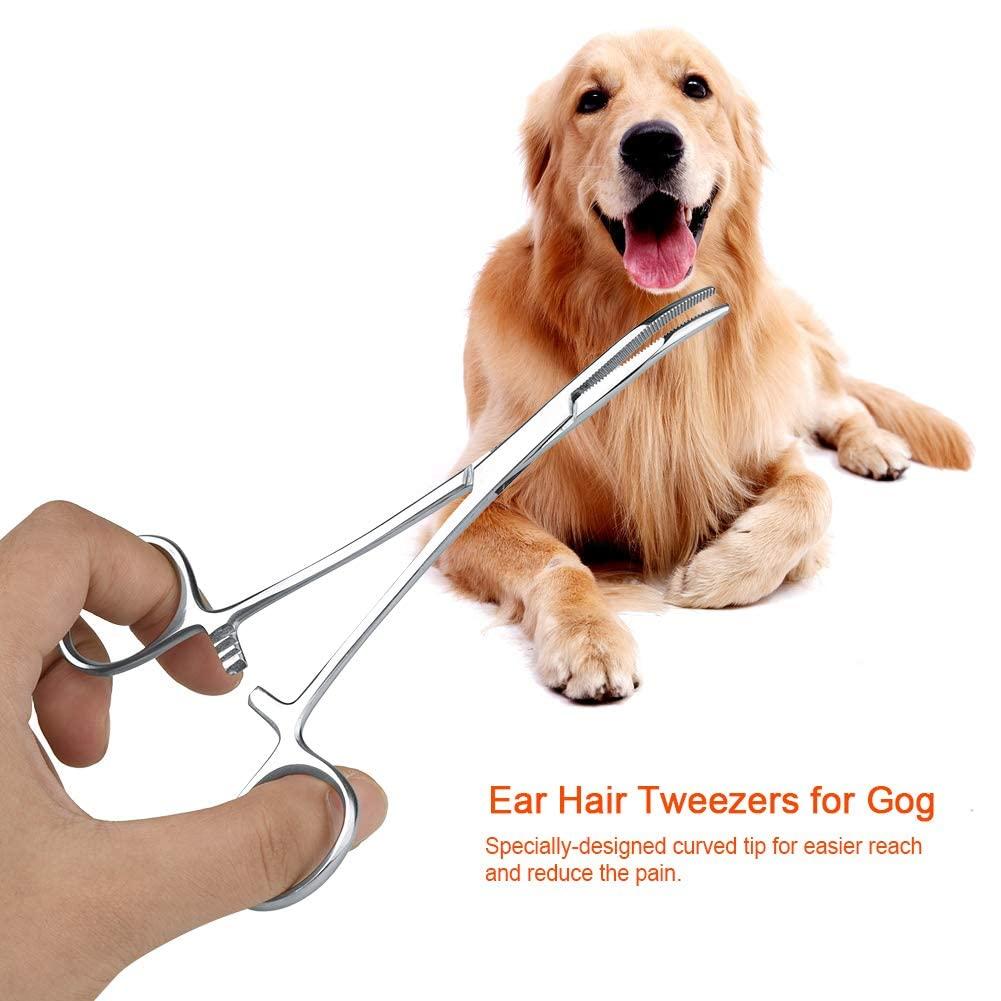
- Tweezers: For dogs with a lot of ear hair, consider using tweezers to carefully pluck away excess hair that may trap dirt and moisture.
Remember, the goal is to keep the process gentle and stress-free for your pet. Regular cleaning with the right tools will help prevent infections and keep your dog’s ears healthy and happy.

Step-by-Step Guide to Safely Clean Your Dogs Ears at Home
Ensuring your furry friend’s ears are clean is crucial for their health and comfort. To start, gather your supplies: dog-specific ear cleaner, cotton balls or gauze, and treats for rewarding your pet. First, find a calm space where your dog feels relaxed. Gently hold your dog’s ear flap upright and carefully fill the ear canal with the cleaner, allowing it to fill completely. Avoid using cotton swabs as they can push debris further into the ear.
- Massage Gently: After applying the cleaner, massage the base of the ear for about 20 to 30 seconds to help loosen any debris or wax.
- Let Them Shake: Allow your dog to shake their head, which will help dislodge excess cleaner and debris.
- Wipe Away: Use a cotton ball or gauze to gently wipe away any residue from the ear canal and flap.
- Repeat if Necessary: If your dog’s ears still appear dirty, repeat the process until they are clean.
- Reward Your Dog: Don’t forget to give your dog a treat and some praise for their cooperation!
Regular ear cleaning, once a month or as recommended by your vet, can prevent infections and keep your dog happy and healthy. Always be gentle and patient, ensuring the experience is positive for both you and your pet.

Recognizing Signs of Ear Problems and When to Consult a Vet
It’s crucial to be aware of the signs that may indicate ear problems in your furry friend. While regular cleaning can help prevent issues, certain symptoms warrant a visit to the vet. Keep an eye out for the following indicators:
- Excessive scratching or pawing at the ears, which might suggest irritation or infection.
- Redness or swelling inside the ear canal, signaling possible inflammation.
- Unpleasant odor emanating from the ears, often a sign of infection or yeast build-up.
- Frequent head shaking or tilting, indicating discomfort or imbalance.
- Discharge from the ear, which could range from waxy to pus-like.
If your dog exhibits any of these symptoms, it’s important to consult with a veterinarian promptly. They can provide a thorough examination and recommend the appropriate treatment to ensure your dog’s ears remain healthy and pain-free.
Creating a Calm and Positive Experience for Your Furry Friend
Ensuring a calm and positive ear-cleaning experience for your dog involves a mix of preparation and gentle handling. Start by gathering your supplies: ear cleaning solution, cotton balls or pads, and treats. Before beginning, create a relaxing environment by choosing a quiet room and softly speaking to your furry friend to ease any anxiety.
- Choose the right moment: Wait for a time when your dog is naturally calm, perhaps after a walk or playtime.
- Introduce the supplies: Allow your dog to sniff the cleaning solution and cotton pads, associating them with positive experiences through gentle praise and rewards.
- Use a gentle touch: Hold your dog’s ear flap up gently and apply a few drops of the solution into the ear canal. Massage the base of the ear for about 30 seconds to loosen debris.
- Wipe away the excess: Use a cotton ball or pad to carefully clean out any visible dirt or wax. Avoid inserting anything deep into the ear canal.
Throughout the process, maintain a warm and reassuring tone. Reward your dog with treats and affection after each step to reinforce positive behavior. Remember, patience and kindness are key to making ear cleaning a stress-free routine for both you and your pet.

